Enduser ISO
Overview
This guide shows you how to use Enduser ISO in Virtualizor End User panel.
NOTE : You will get this option ONLY if your admin has enabled this setting from Admin panel.
Add ISO
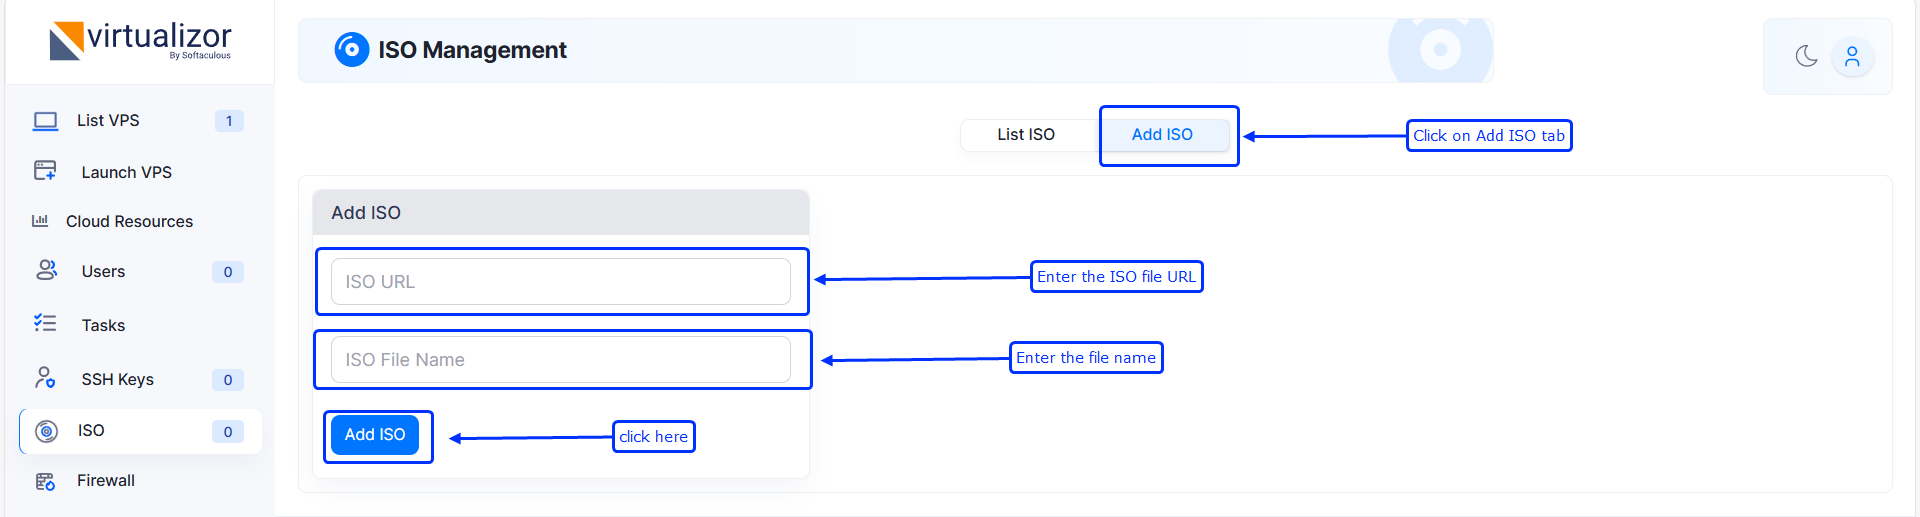
To add ISO, You need to provide valid ISO URL and name. After adding, the ISO will be added and will be visible on the page.
Set Enduser ISO for a VPS
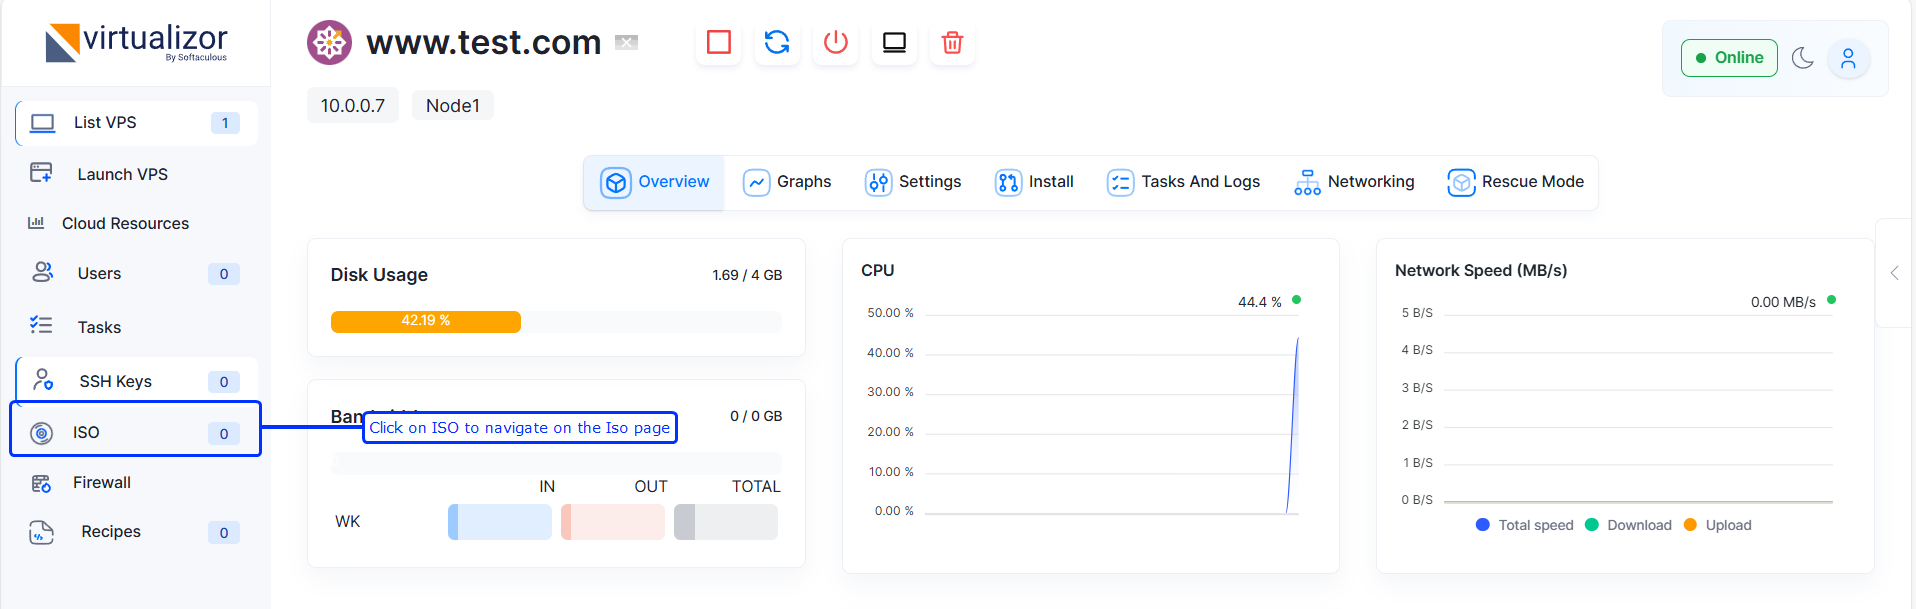
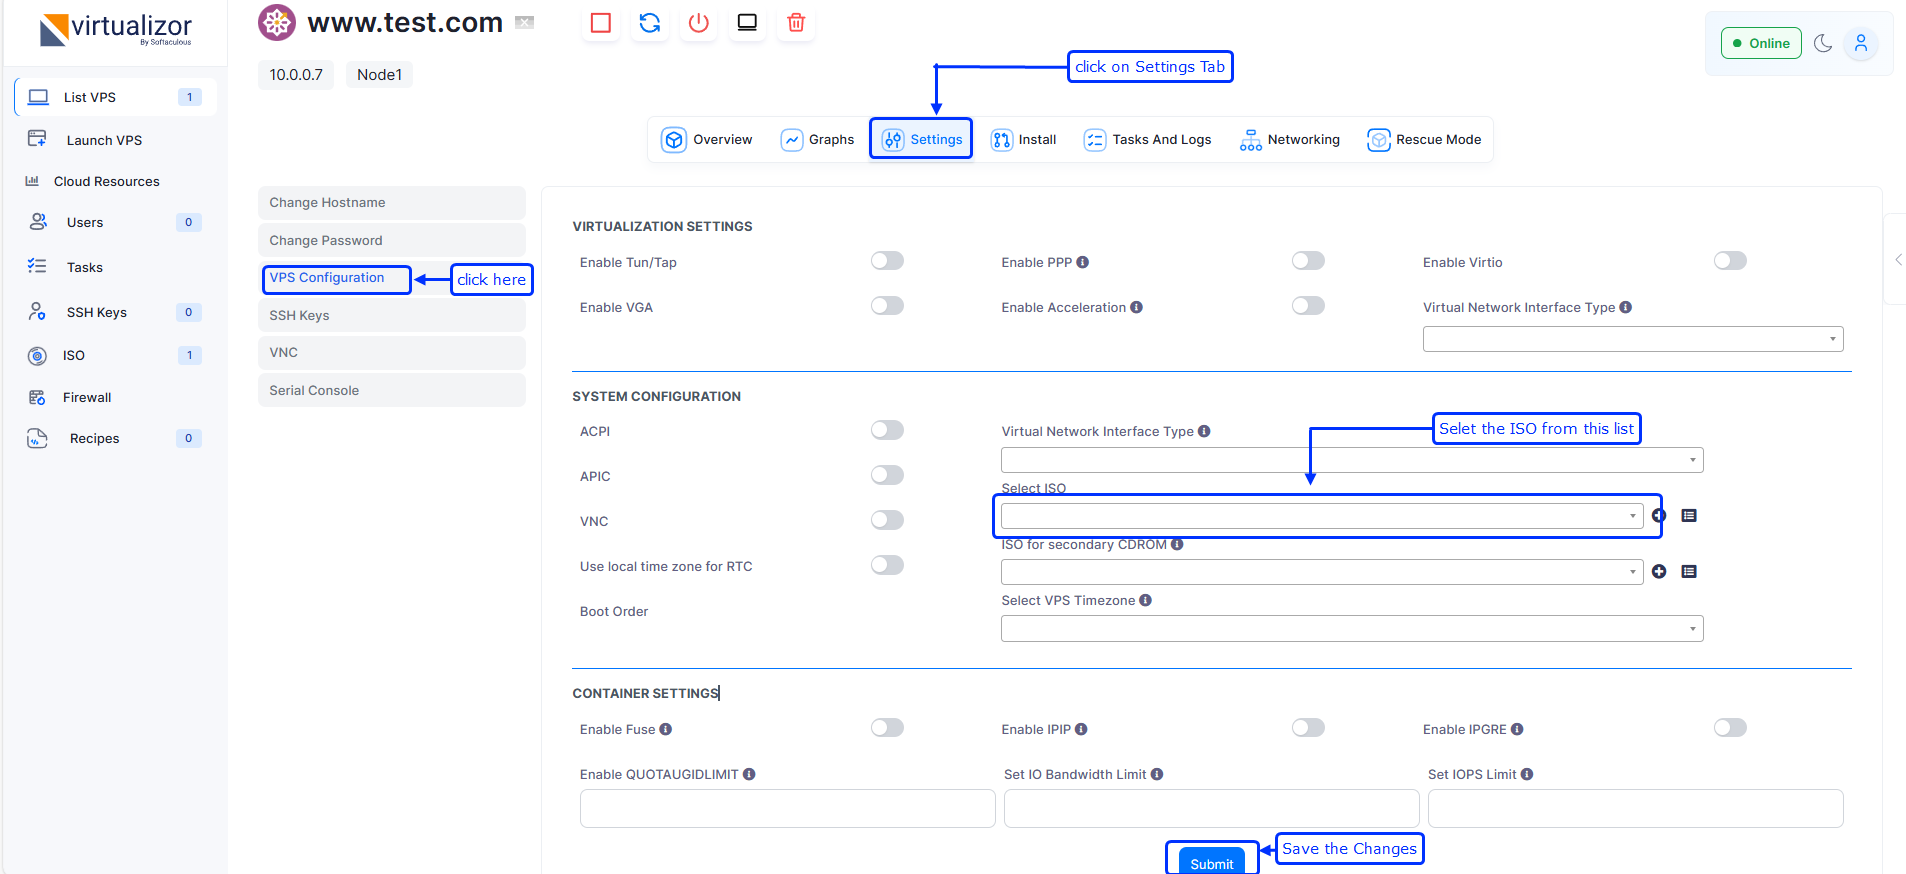
Enduser can set an ISO using the configuration menu.
Following are the steps to set an ISO for a VPS :
- Select vps configuration option on manage VPS page.
- Select primary ISO and secondary ISO (if any) and select the boot order: 1) CD Drive 2) Hard Disk.
- Stop and start the VPS.
Remove an ISO
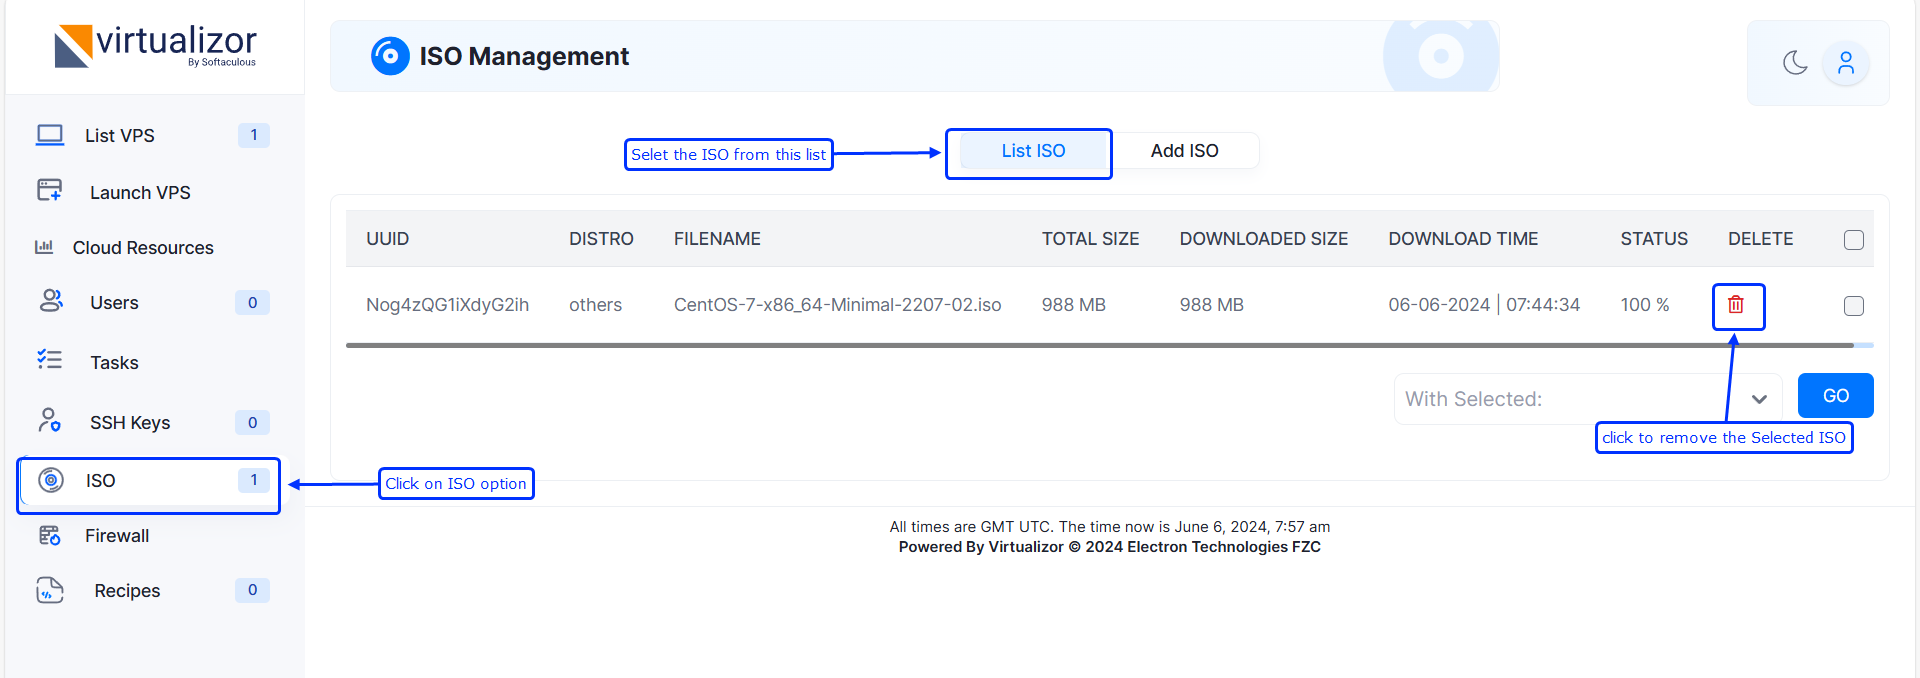
Enduser can remove an ISO from ISO management page.
Follow the steps to do so :
- Select the ISO(s) you want to delete.
- Confirm the deletion.